Vacation Lights with Home Assistant
Looking for an easy way to set up vacation lights with random on and off times with Home Assistant? This step-by-step tutorial guides you through the setup process.
We are going to set up one automation to turn on and off a light at a random time.
Prerequisites
- A running Home Assistant installation
- At least one smart light bulb already connected to Home Assistent (I will use a hue light bulb in this tutorial.)
Goals
- Turning on a light at a random time between 8 and 9 am.
- Turning off a ligh at a random time between 10 and 11 pm.
- Having a switch to enable or disable the vacationn mode.
First step: Creating a helper
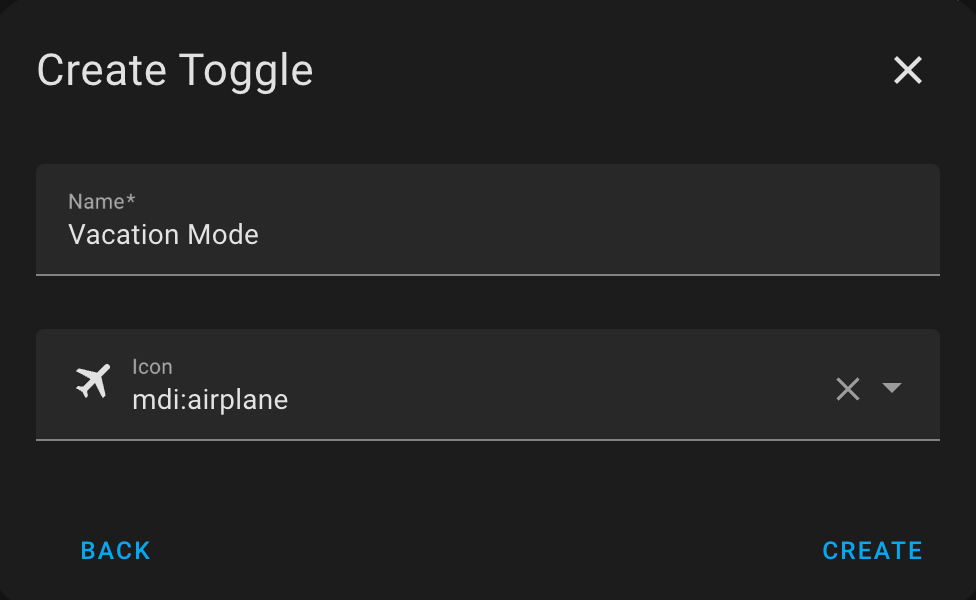
Go to "Settings" -> "Devices & services" -> "Helpers" and click on the "+ CREATE HELPER" button. Select "toggle" and fill out form.
 |
|---|
| Set the name to "Vacation Mode" and select an icon. |
That's it for the helper part.
Second step: Creating the automation that turns on the light
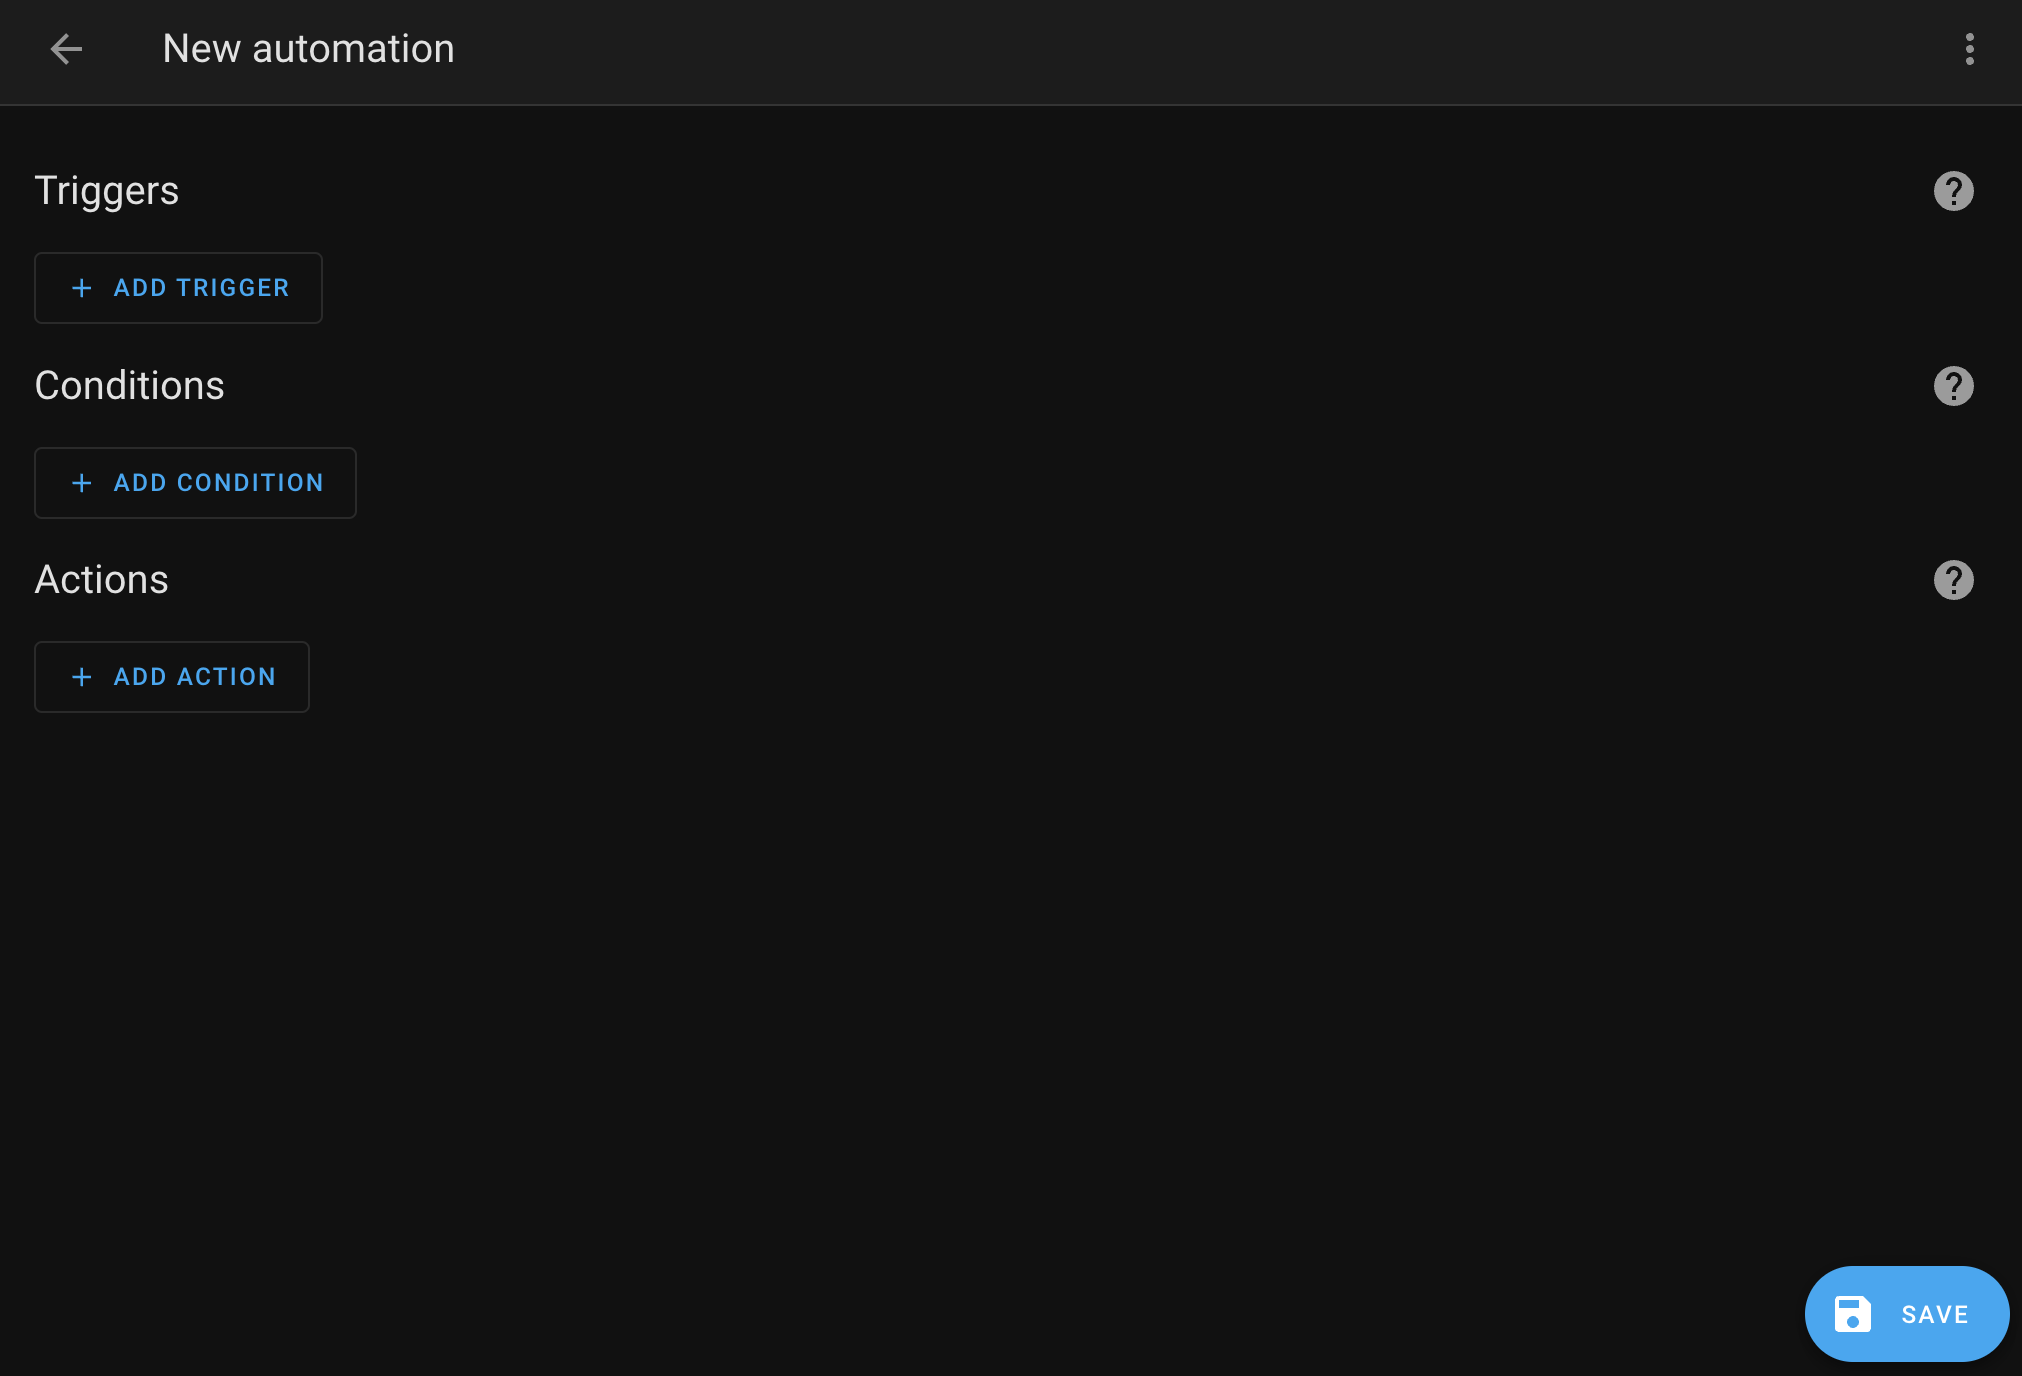
Go to "Settings" -> "Automations & scenes" -> and click on the "+ CREATE AUTOMATION" button. Select "Create new automation" and you have a blank automation to start with.
 |
|---|
| Let's start with an empty canvas. |
Triggers
Reminder: We want the light to go on at a random time between 8 and 9 am and to turn off at a random time between 10 and 11 pm.
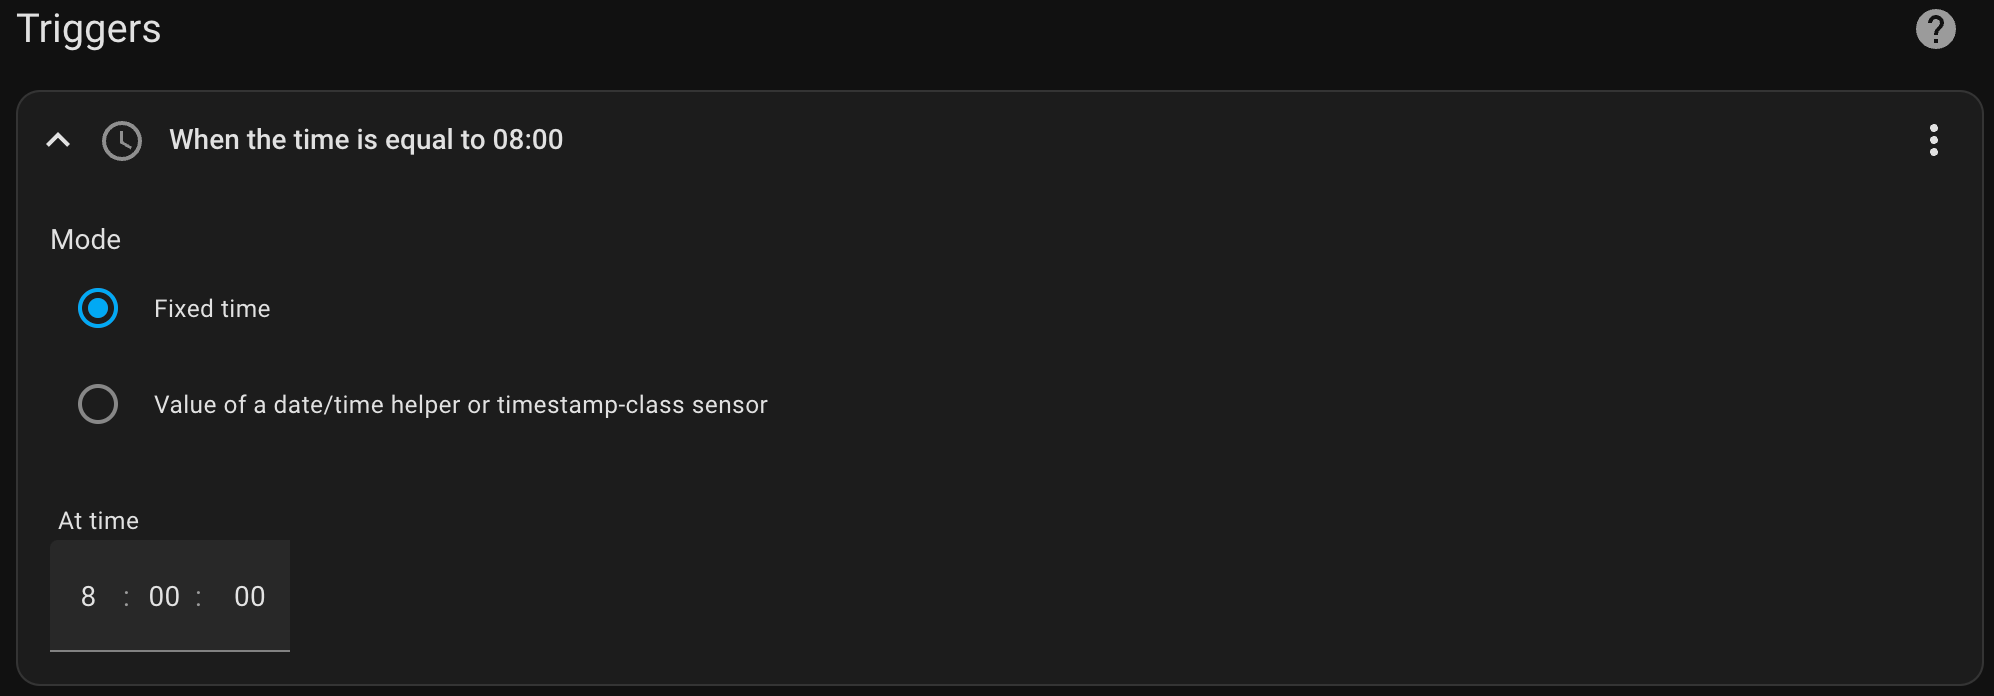
Click "Add Trigger" and select "Time". Set the trigger to "Fixed Time" and set its value to 08:00:00.
 |
|---|
| Start the automation at 8 am. |
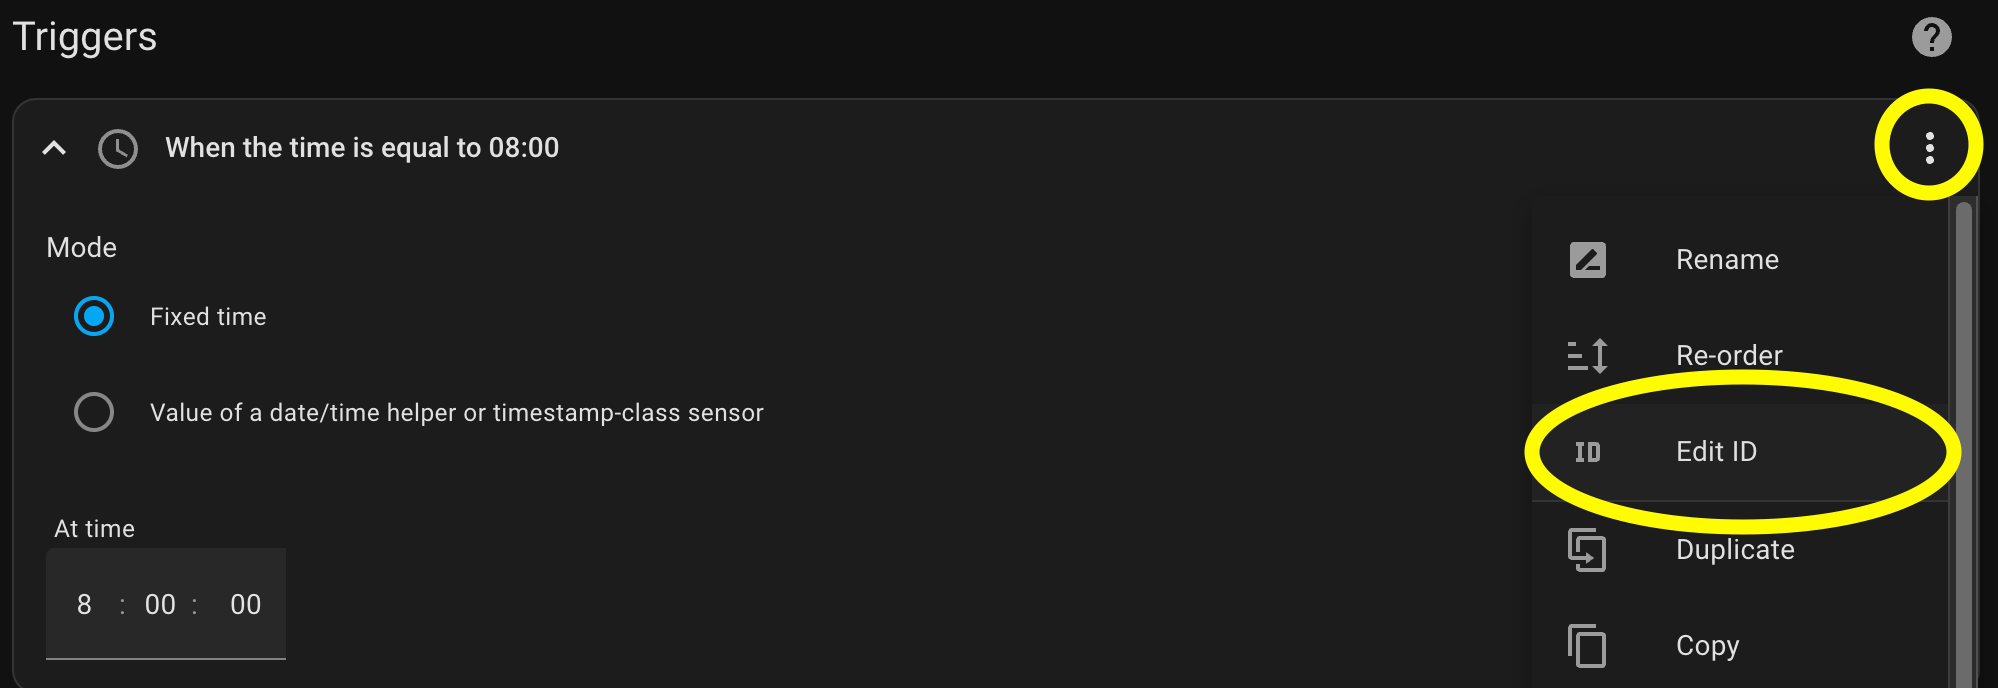
Then click on the 3 dots next to the trigger's title and select "Edit ID".
 |
|---|
| Select the "Edit ID" item. |
Give the trigger a descriptive ID. I'm using "at 8am" for obviouse reasons.
 |
|---|
| Give the trigger a descriptive name. |
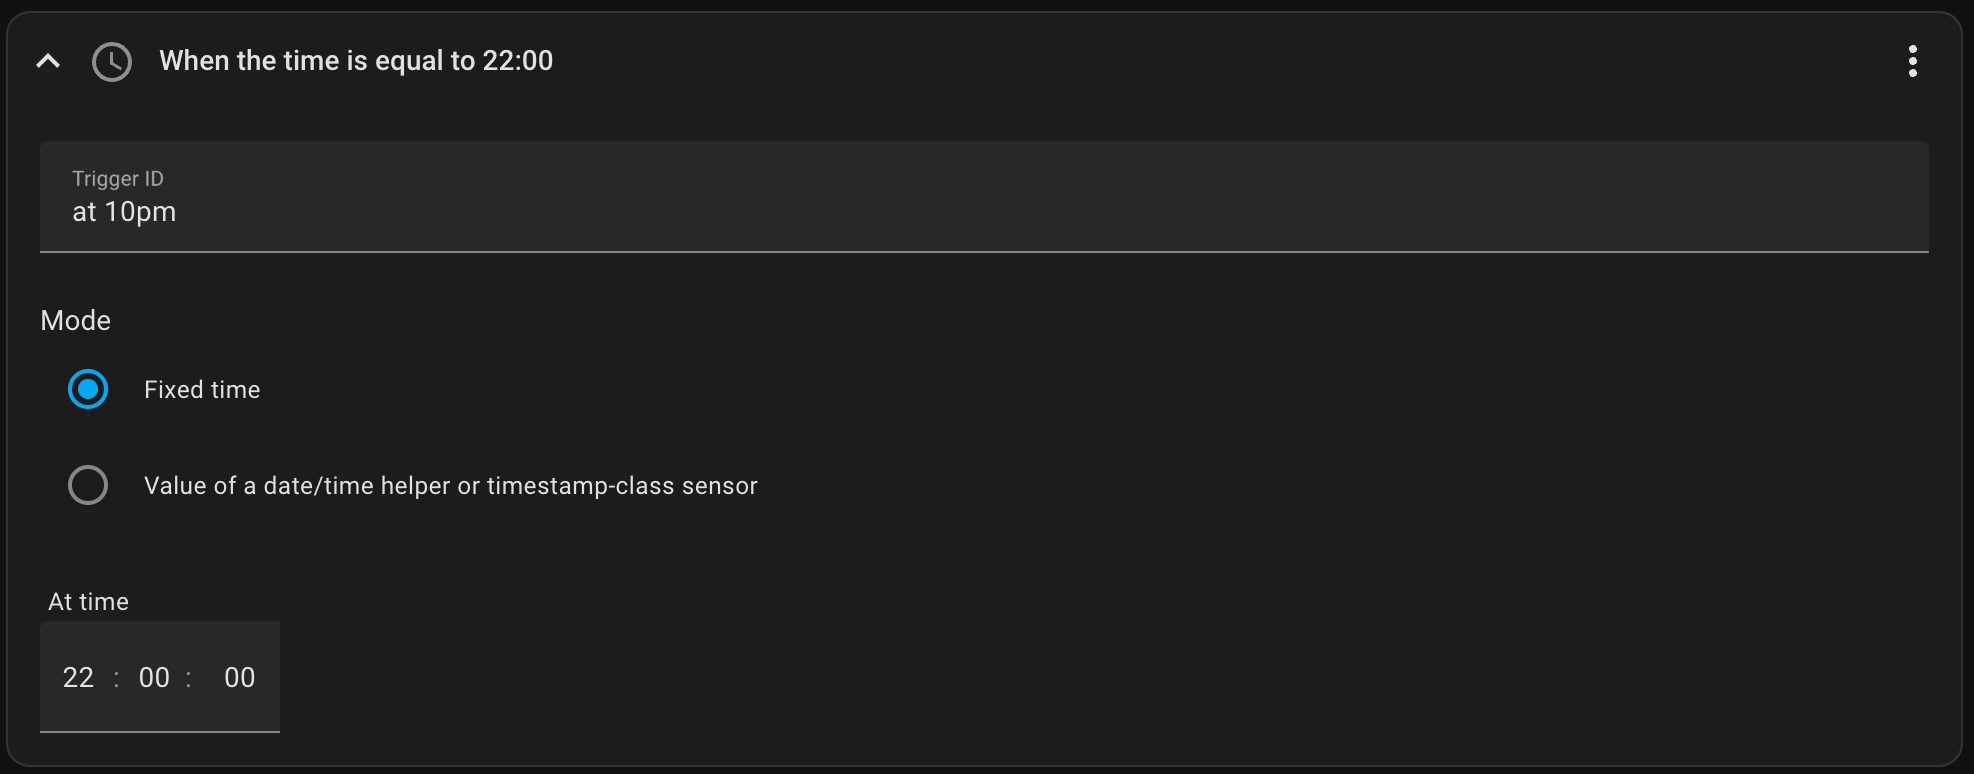
Now we repeat these steps and create another trigger at 10 pm and give it the ID "at 10pm".
 |
|---|
| Create the second trigger for 10 pm. |
Conditions
Reminder: We want to be able to turn the vacation mode on and off.
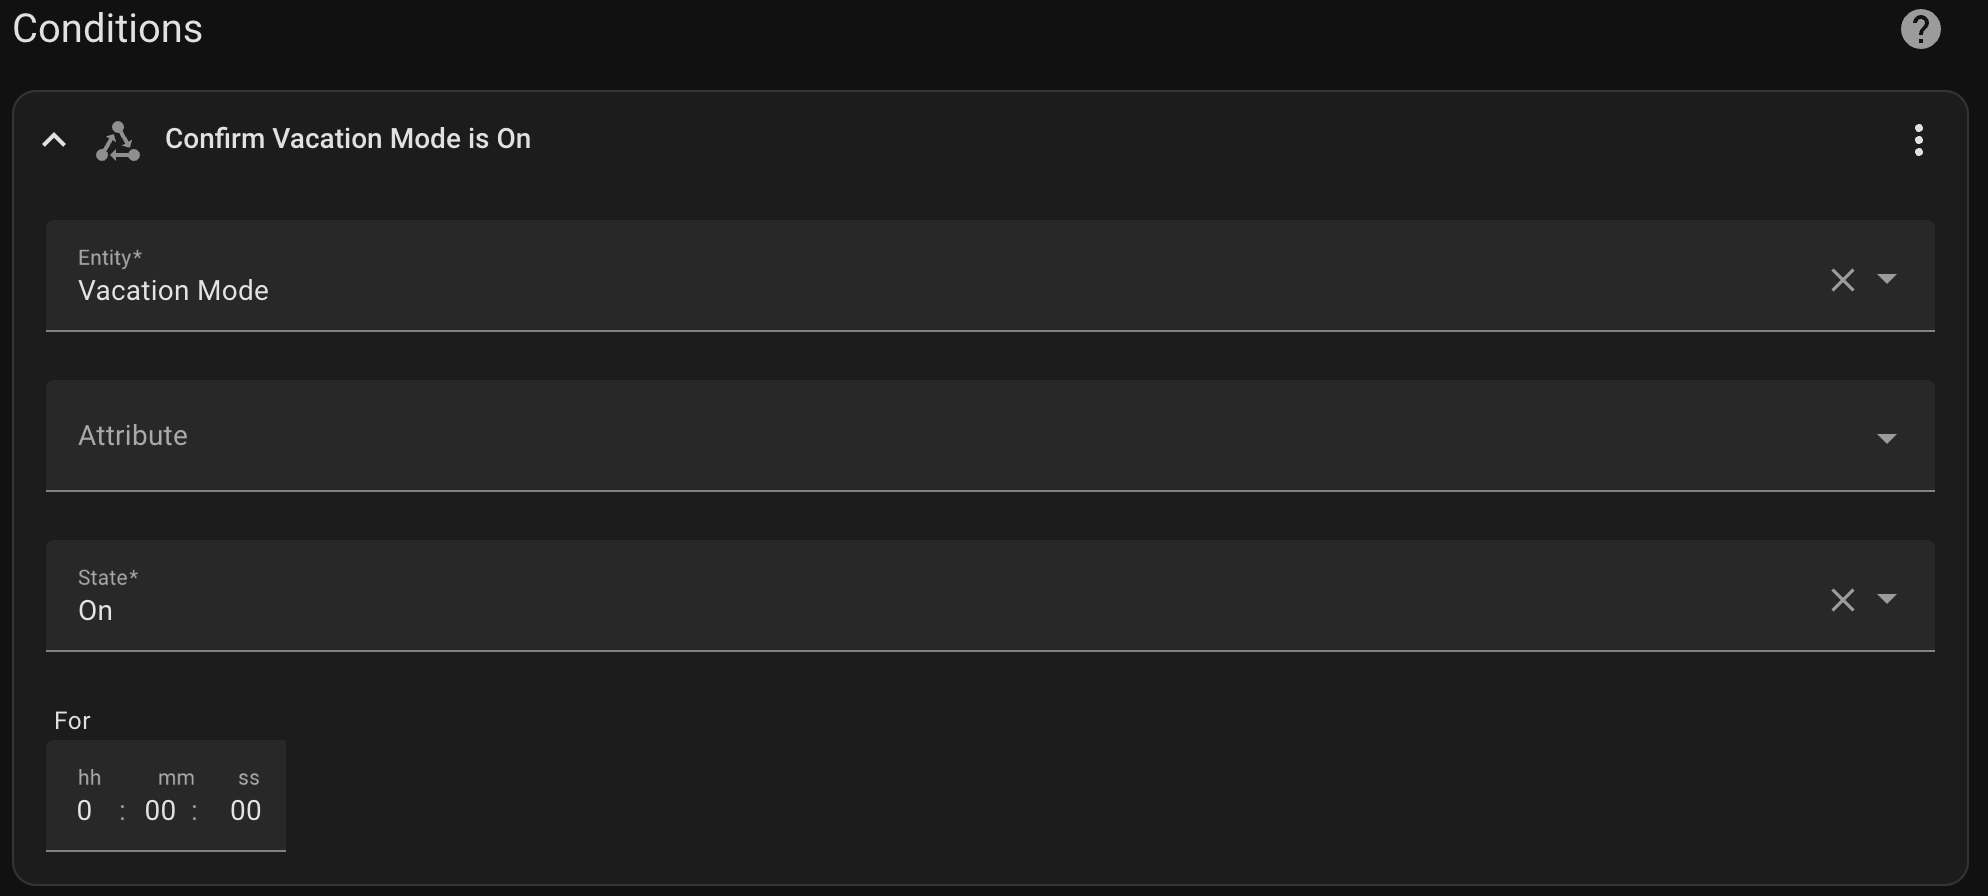
For the condition we are using the helper we created before. Click "ADD CONDITION" and select "state". The entity is the "Vacation Mode helper" (input_boolean.vacation_mode) and the state is "On".
 |
|---|
| This condition blocks the automation from running any actions if the vacation mode is set to "Off". |
Actions
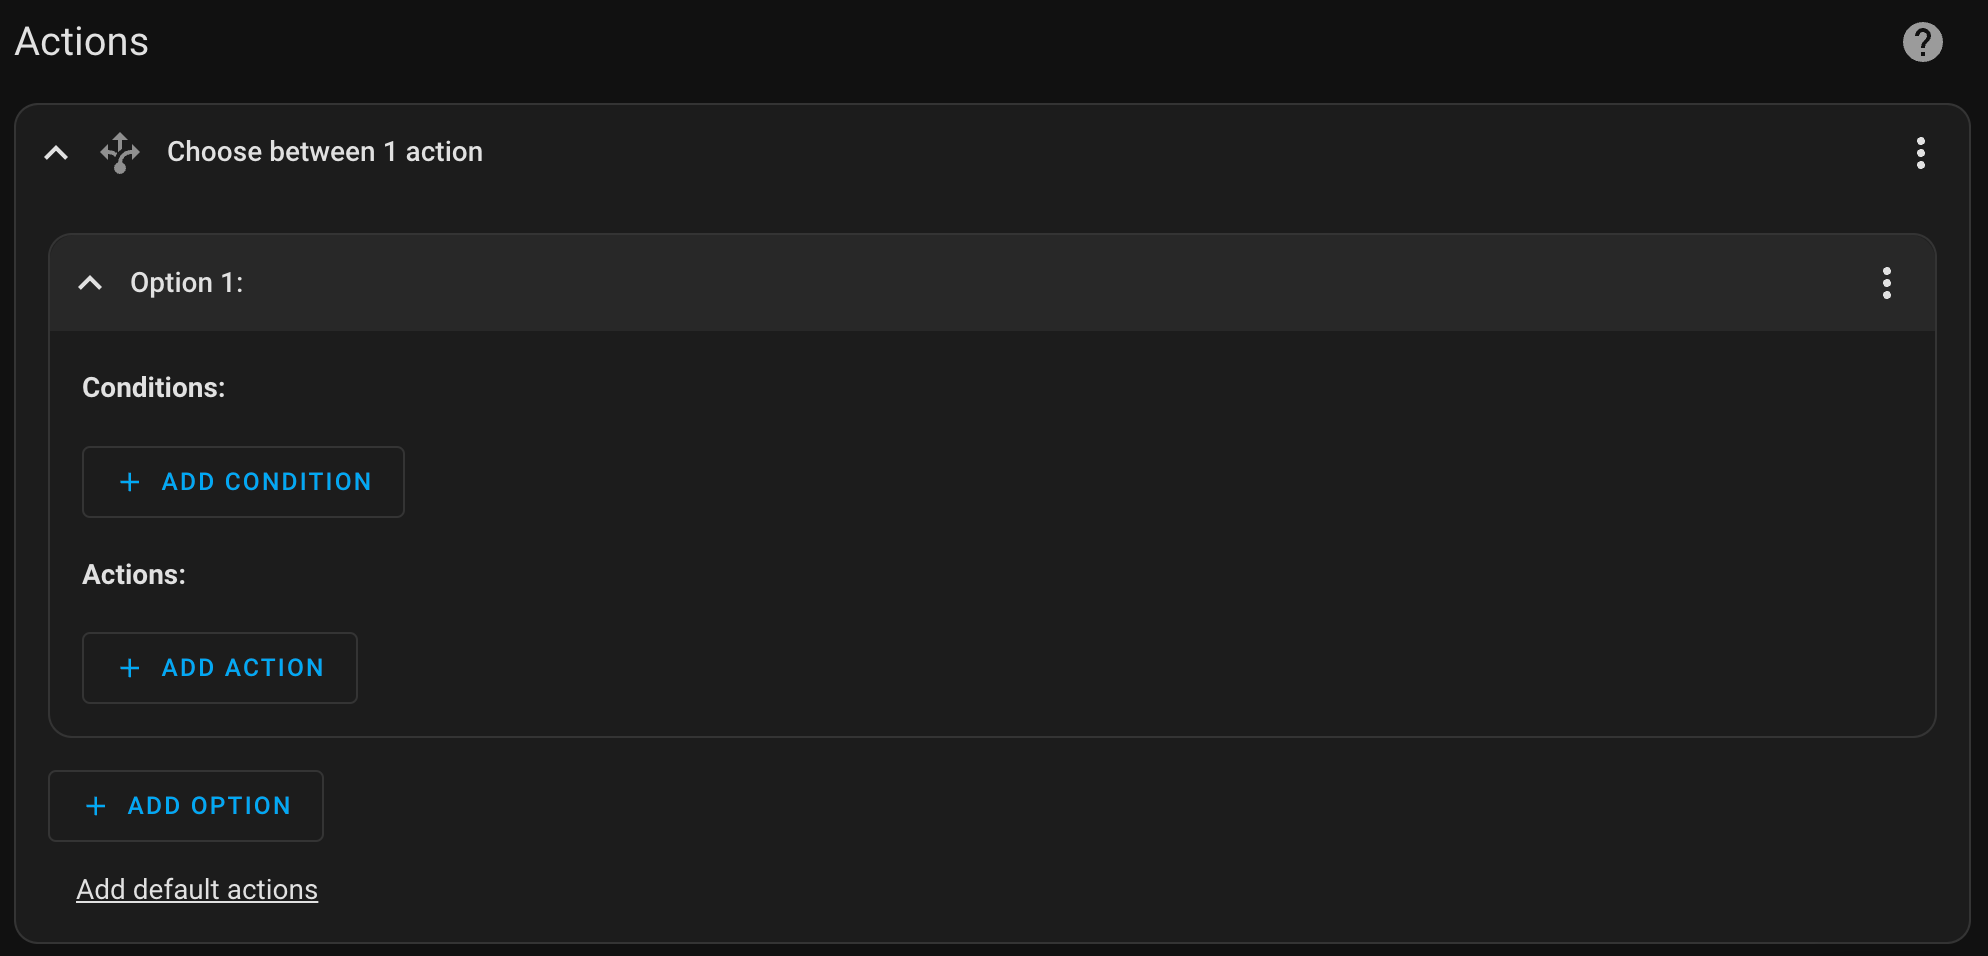
We have created to triggers with different trigger IDs. To make use of the IDs we first need to add a "Choose" action. Go to "ADD ACTION" and select "Choose".
 |
|---|
| This makes it possible to run different action based on the trigger that started the automation. |
Option 1: Turning the light on between 8 and 9 am
Reminder: We want to turn on the light randomly between 8 and 9 am as well as off between 10 and 11 pm. So far the automation starts at 8 am or 10 pm and wants to launch an action item if the Vacation Mode is set to "On". To create the randomness? Simple: We delay the action by a random number of minutes (between 1 and 60 minutes).
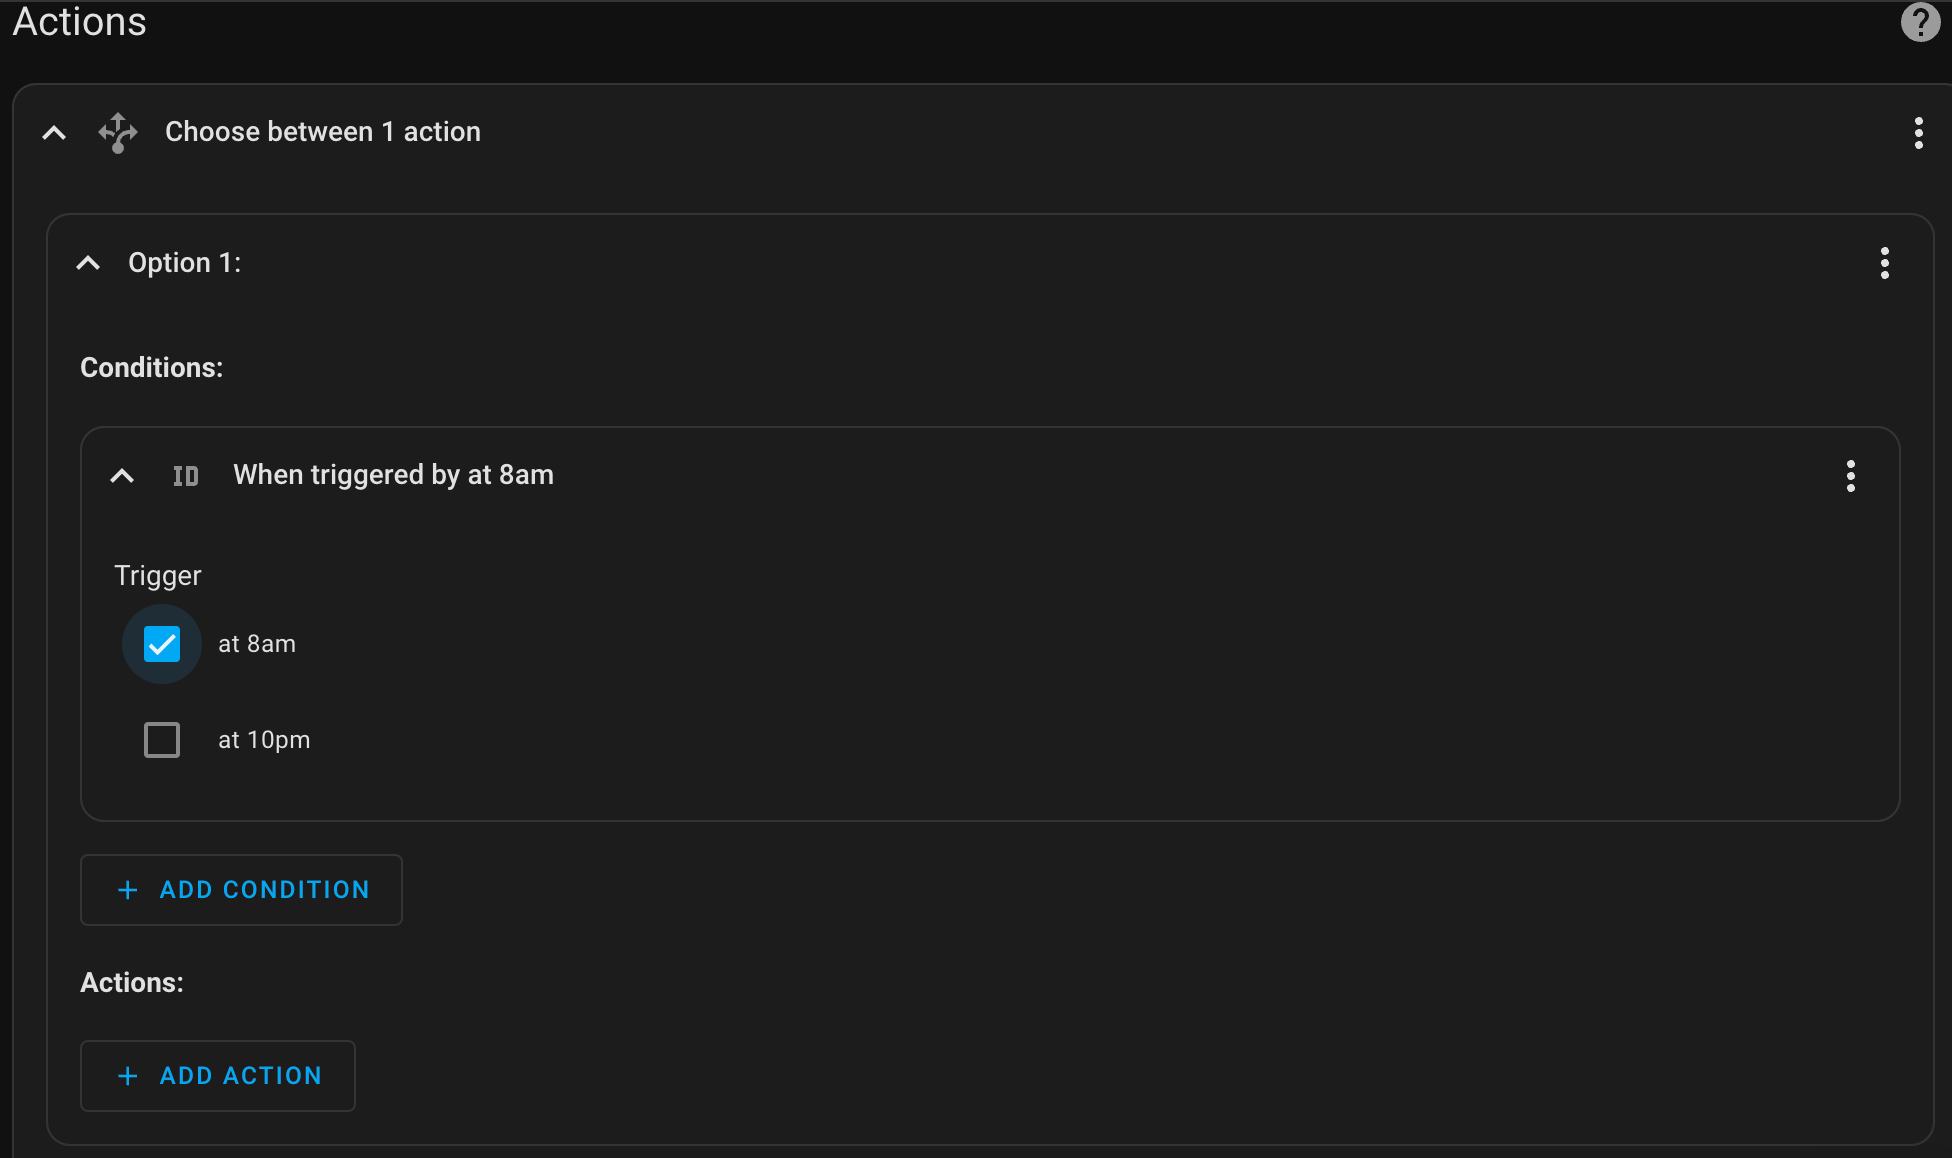
Within the Option 1, click on the "ADD CONDITION" button and select "Triggered by". This gives us the option to select the trigger with the ID "at 8am".
 |
|---|
| Select the trigger. |
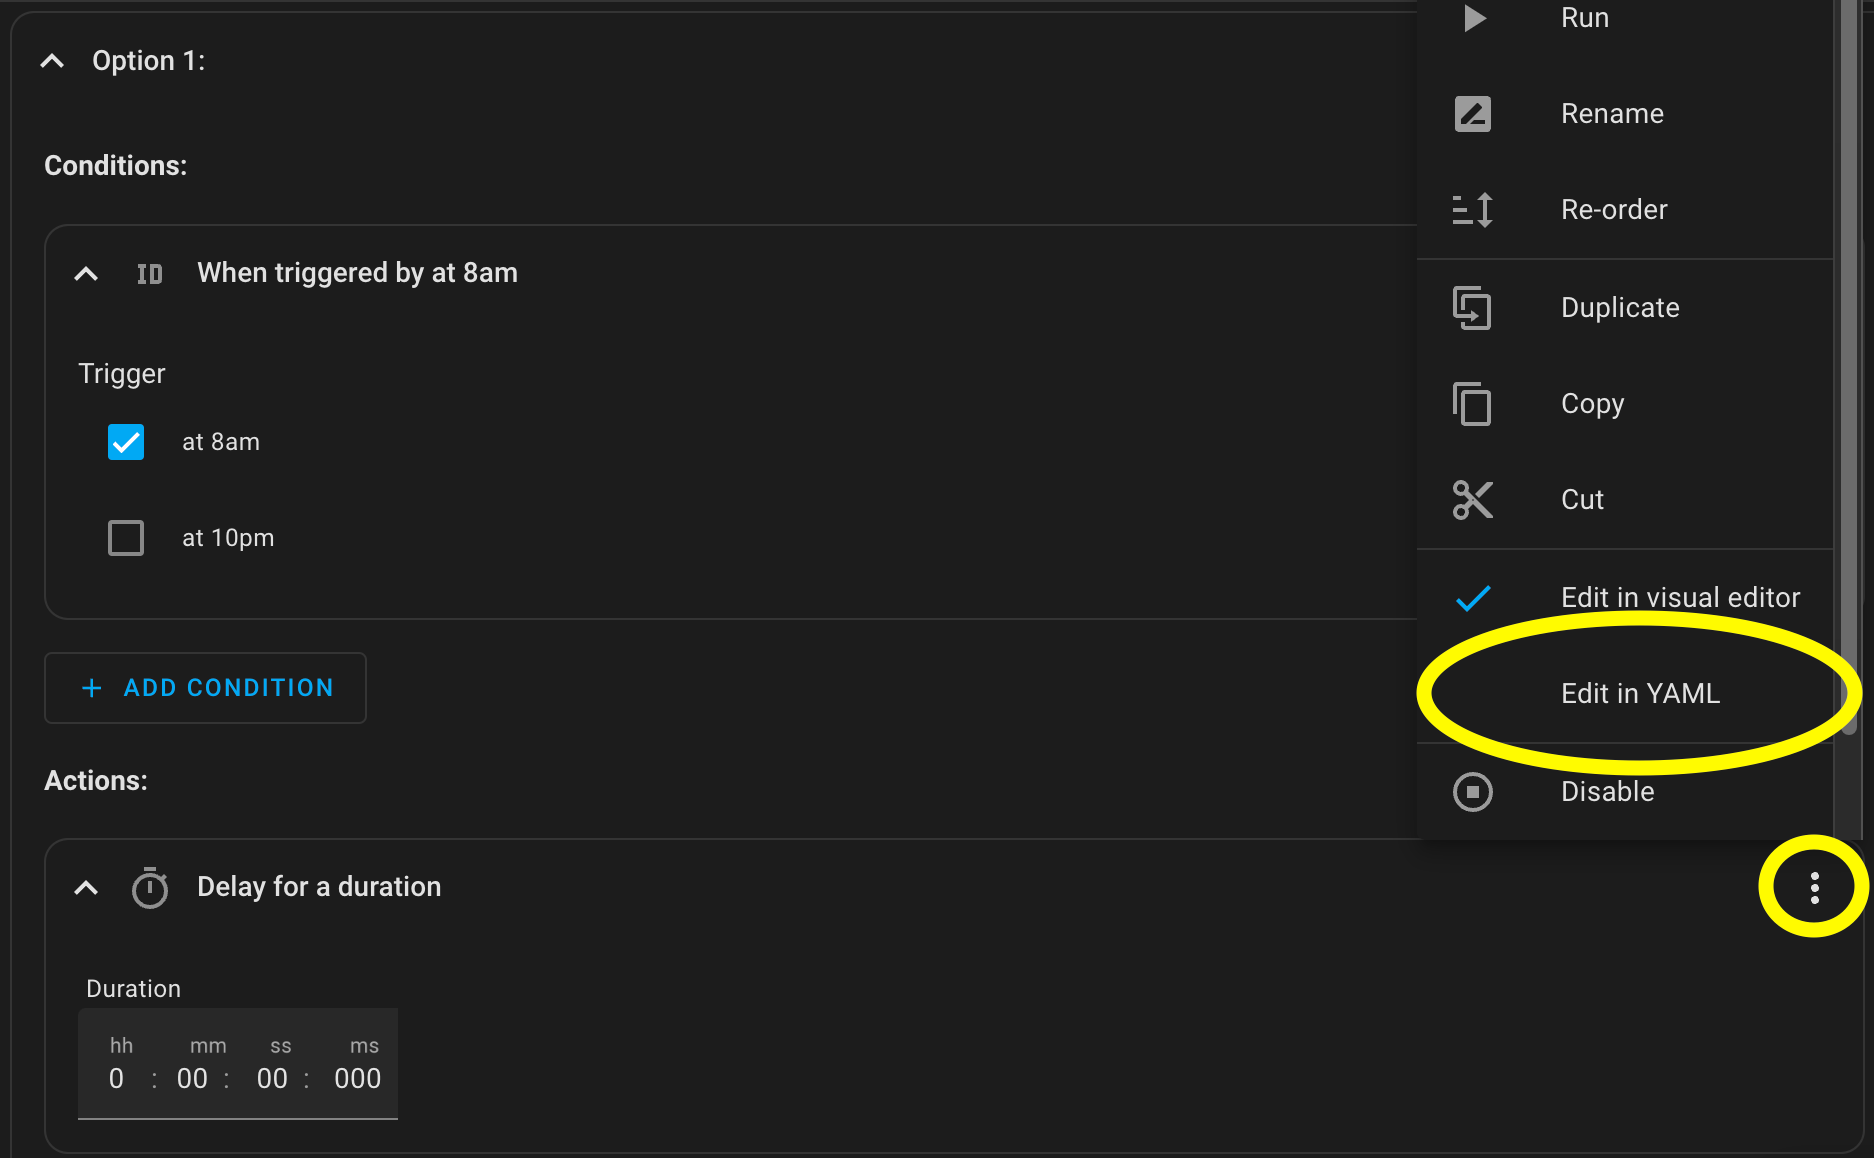
Now we have to delay the action by a random amount of time. Click on ""ADD ACTION" within "Option 1" and select "Wait for time to pass (delay)". Then click on the 3 dots next to the title and select "Edit in YAML"
 |
|---|
| This allows to use a template in a delay action. |
Replace the existing yaml code with:
delay: 00:{{ (range(1, 60)|random|int) }}:00
 |
|---|
| This template randomly generates a number between 1 and 60 and uses that number as the delay in minutes. |
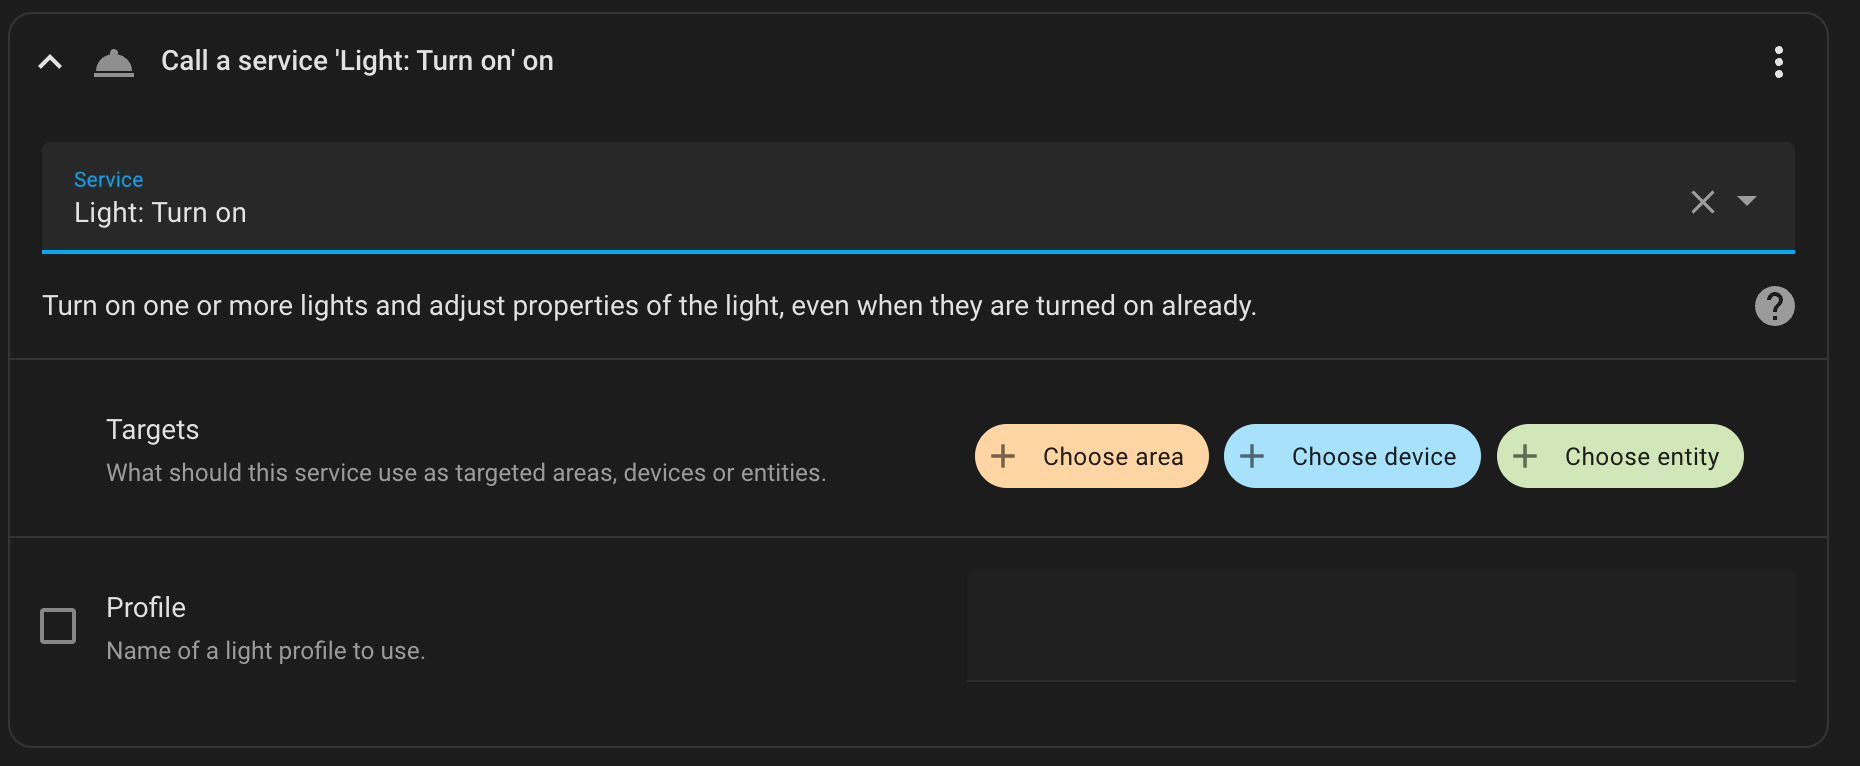
Underneath the delay action, we create the action item that turns on the light. Click on "ADD ACTION" and select "Call service". We want to call the "Light: Turn on" (light.turn_on) service.
 |
|---|
| This service allows to turn on light entities in Home Assistant. |
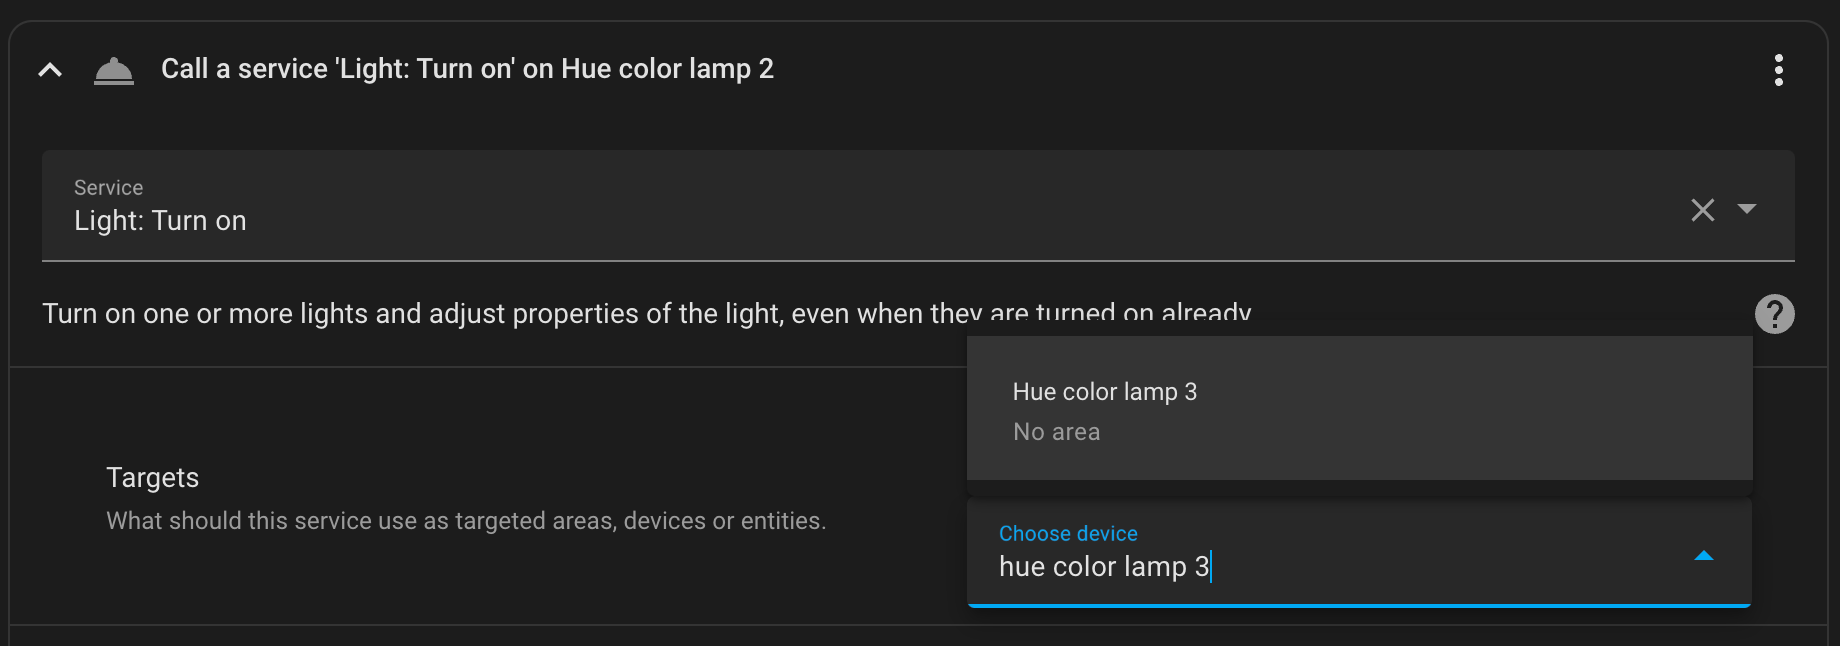
Within the target section, click on "Choose devices" and select the light you want to turn on.
 |
|---|
| In my example, I want to turn on and off my Hue lamp 3. |
If your light allows it you can set up additional options like brightness or colors. For me, just turning the light on is good enough.
If you followed along, your action section should look like this:
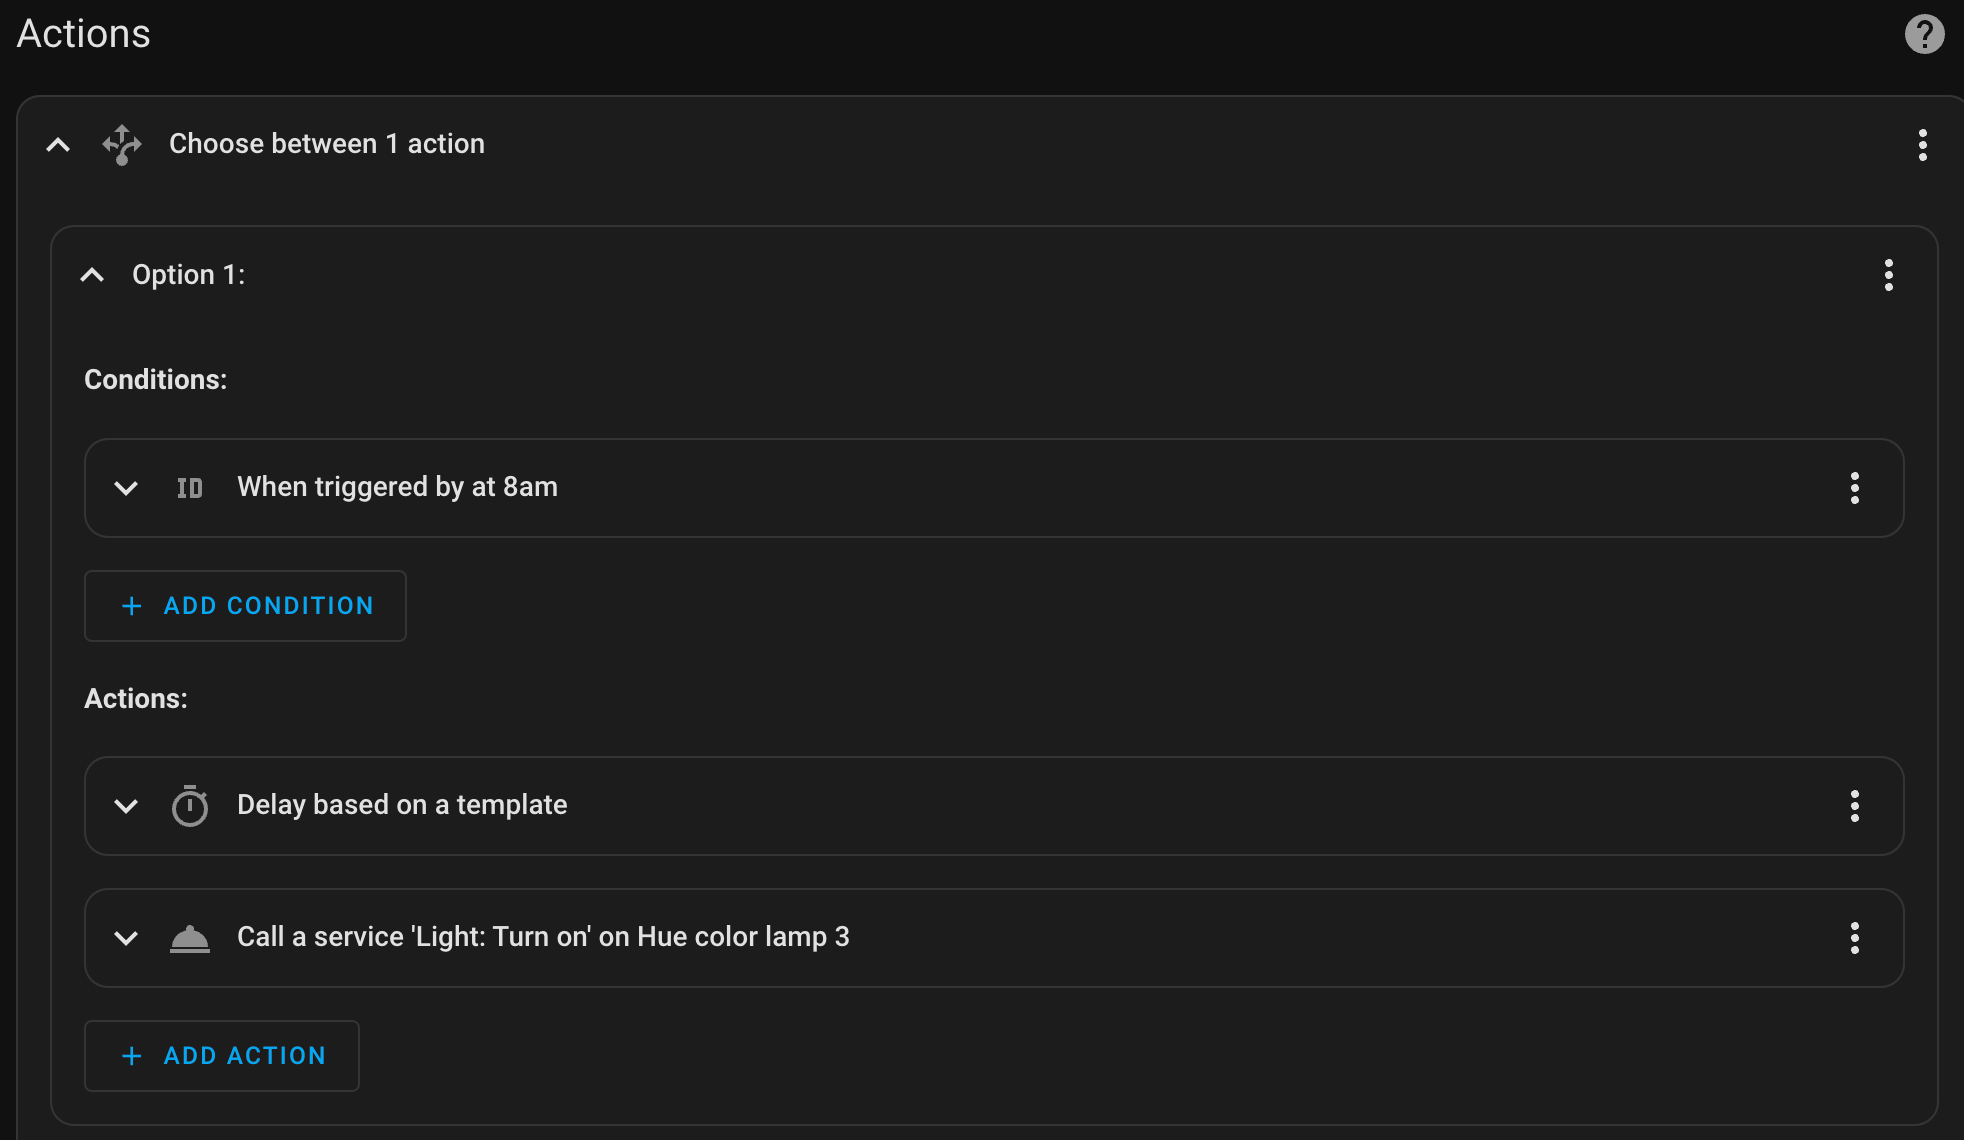 |
|---|
| Complete action section for option 1. |
Option 2: Turning the light off between 10 and 11 pm.
Now we have to set up the option that turns off the light. Click on "ADD OPTION" within the "Choose" item.
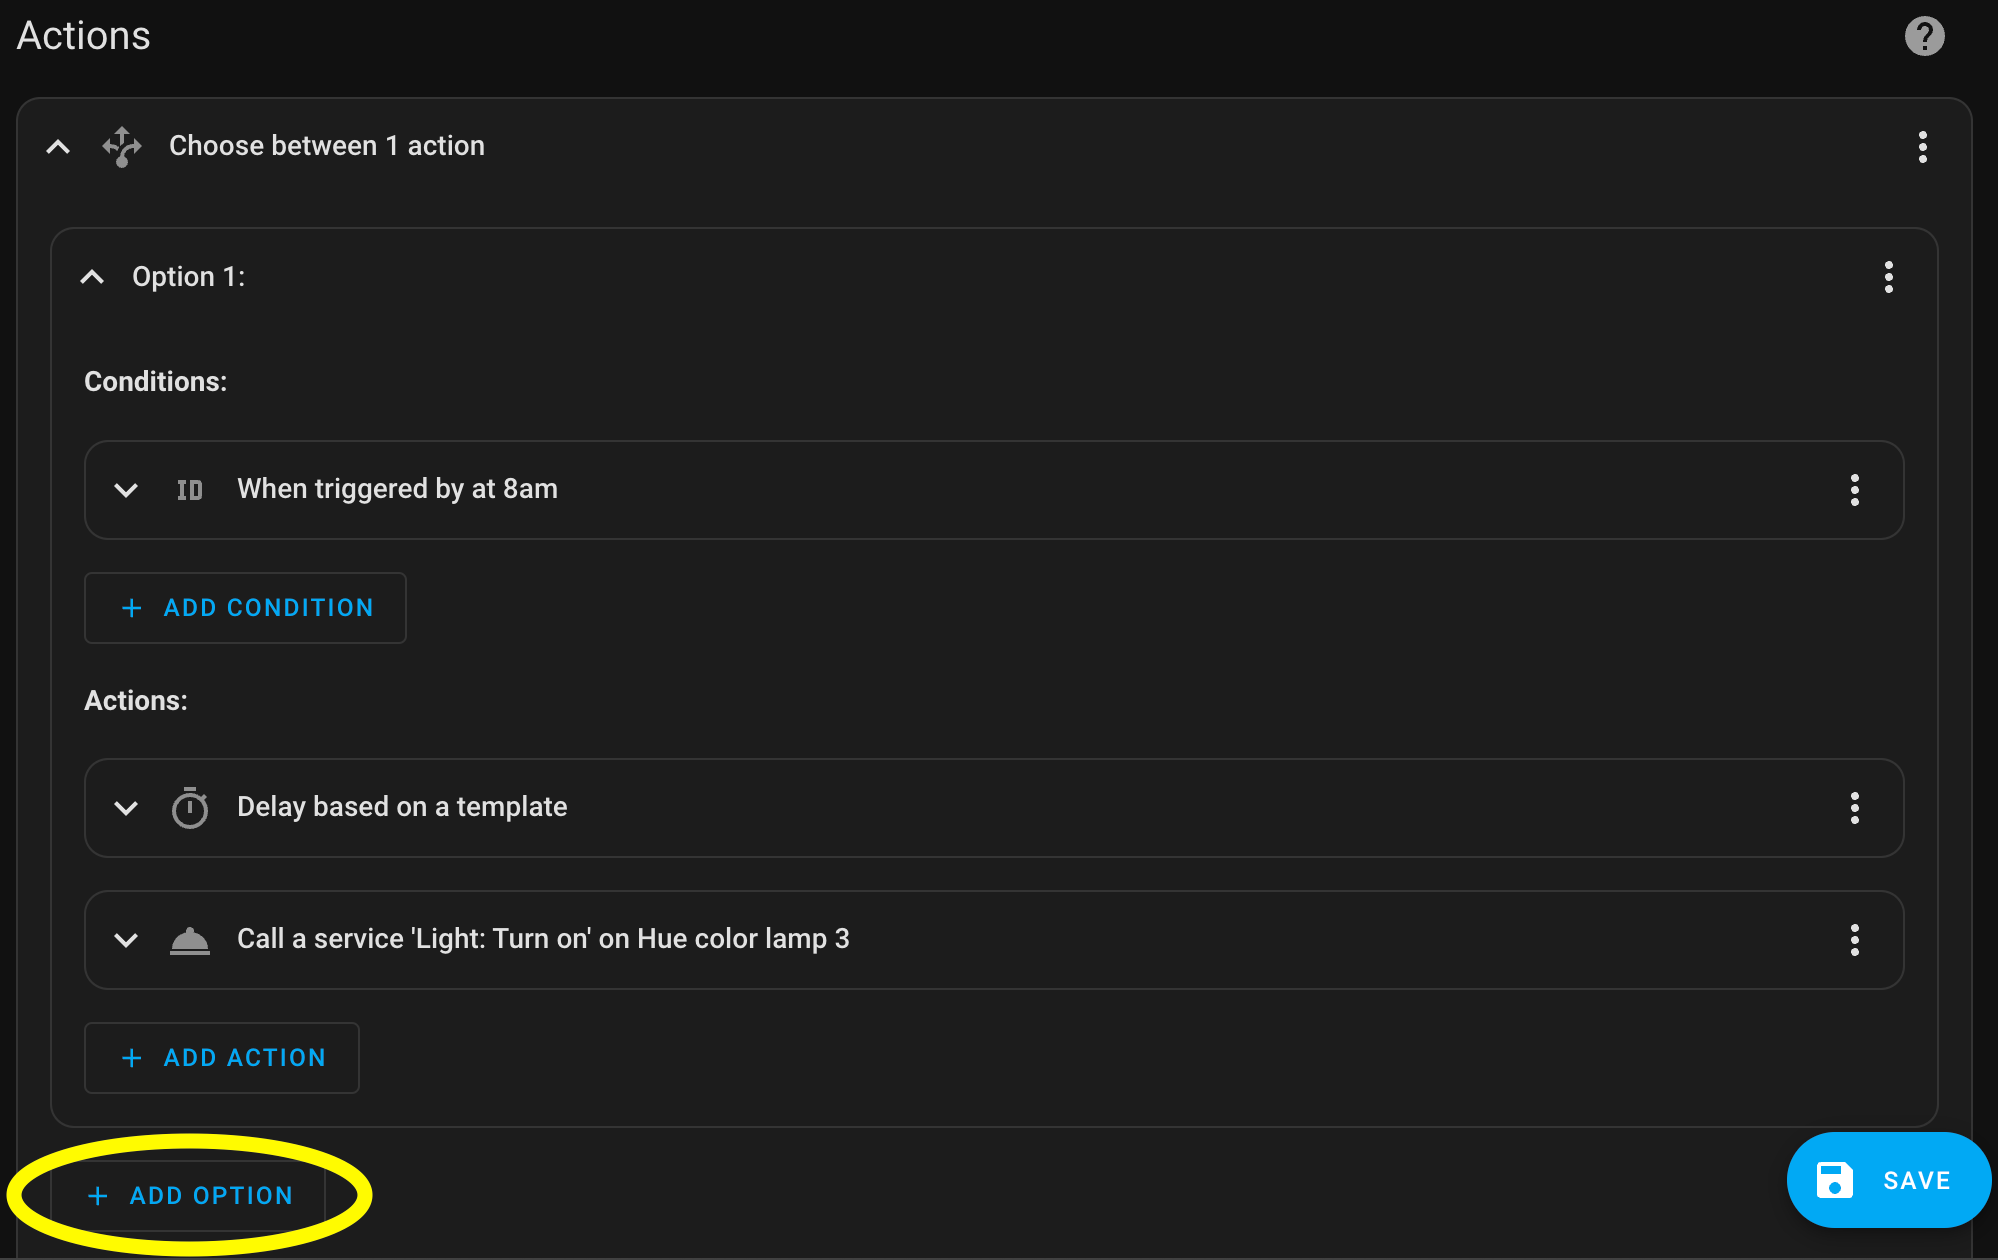 |
|---|
| Add a second option. |
We set up the second option similar to optin 1. Except that we use the trigger with the ID "at 10pm" and the service "Light: Turn off" (light.turn_off).
The option two should look like this:
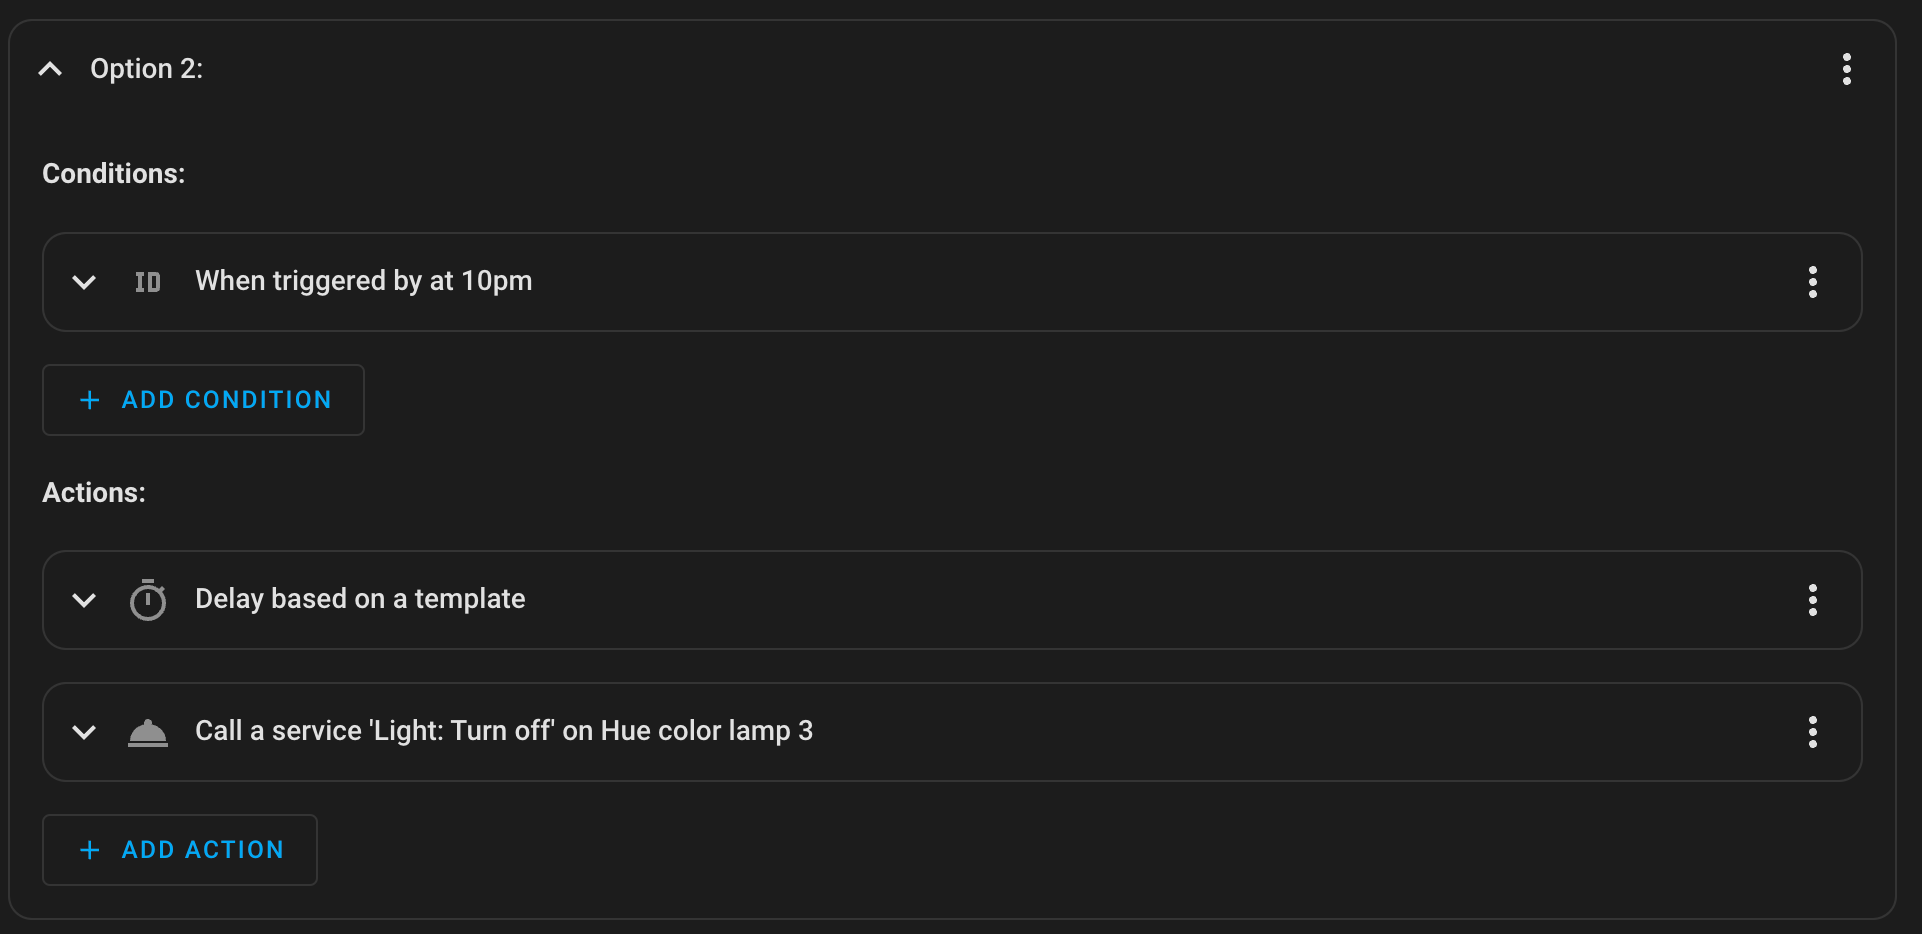 |
|---|
| Option 2 that turns off the Hue light 3. |
Finishing up
All that is left is to save the automation and give it a name and a description (if you want).
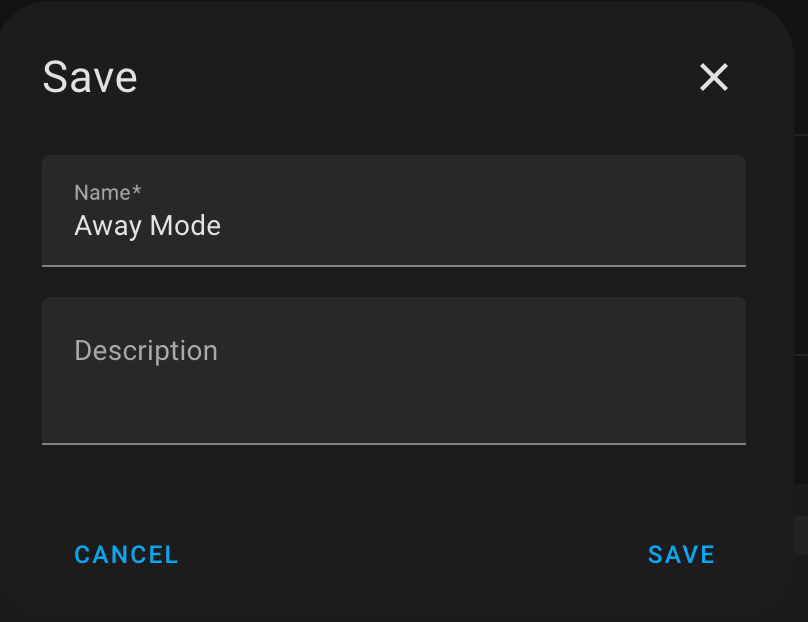 |
|---|
| Give it a name and you're done. |
Conclusion
After all the work, you have a automation that randomly turns on and off a light in your house or appartment. Make sure that you set the "Away Mode" toggle to "On" if you want to use the automation to simulate presence.
Note: This is a simple way to automate a light with a random delay. If you restart your Home Assistant instance (or loose power) while the delay is running, the light won't turn on or off. Home Assistant will forget any delays after a restart. There are ways to make the automation persistent, but that is not the scope of this article.
For the purists or the lazy ones: yaml code
If you don't want to use the visual editor, you can copy the yaml code into your Home Assistant instance. Make sure to enter the "entity ID" of your light.
alias: Away Mode
description: ""
trigger:
  - platform: time
    at: "08:00:00"
    id: at 8am
  - platform: time
    at: "22:00:00"
    id: at 10pm
condition:
  - condition: state
    entity_id: input_boolean.vacation_mode
    state: "on"
action:
  - choose:
      - conditions:
          - condition: trigger
            id:
              - at 8am
        sequence:
          - delay: 00:{{ (range(1, 60)|random|int) }}:00
          - service: light.turn_on
            data: {}
            target:
              device_id: !!INSERT YOUR DEVICE ID!!
      - conditions:
          - condition: trigger
            id:
              - at 10pm
        sequence:
          - delay: 00:{{ (range(1, 60)|random|int) }}:00
          - service: light.turn_off
            target:
              device_id: !!INSERT YOUR DEVICE ID!!
            data: {}
mode: single
